
HD Pro Duplicator - Logging - Logging Using the Control Manager Software

Users with a computer running Windows operating systems can connect the Kanguru Clone HDD Duplicator to their PC for robust logging. The Control Manager software can be downloaded from our support site.
To use the Kanguru Control Manager software for logging:
- Connect the Kanguru Clone to the PC using the provided Serial to USB adapter cable.
- The serial end of the cable connects to the port located on the back of the duplicator.
- The USB end of the cable connects to a USB port on your PC.Note: If this is your first time connecting the Serial to USB adapter cable to your computer, you will need to install the device driver. The device driver can be found on the CD that came with your duplicator, located in the “Serial to USB Driver” folder.
- Power on the Kanguru Clone Duplicator. Make sure that Main Setup > Set UART Control option has been enabled on the duplicator.
- Load the CD that came with your duplicator into the PC and open the folder named “Kanguru Control Manager”.
- Double-click on the ControlManager.exe file to launch the Control Manager Software.
Once the Control Manager software is running, you need to establish the connection between the Kanguru Clone Duplicator and the application. To establish the connection:
- Click on the Configure menu in the Control Manager window.
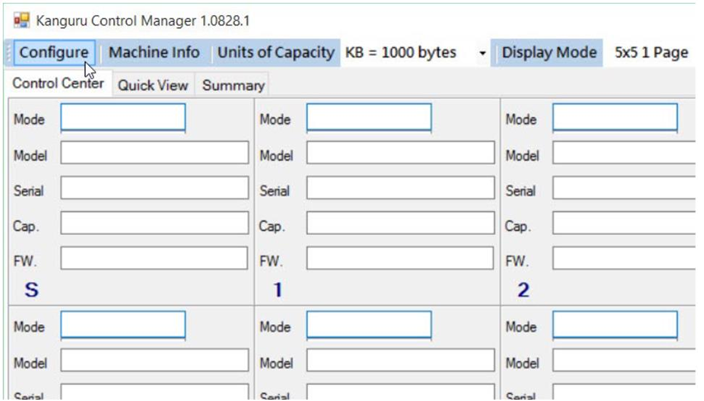
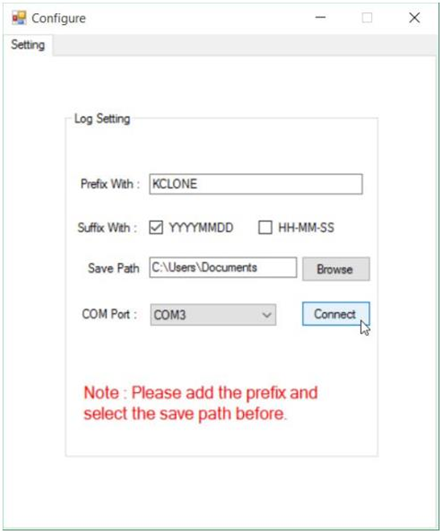
- The Configure window appears.
- Enter a prefix for the log’s file name. You can also choose to suffix the file name with a date or time stamp.
- Select the path where you want the log files saved to. It is recommended to save to a local hard drive and not a removable device.
- Select the COM port
- Click on the Connect button
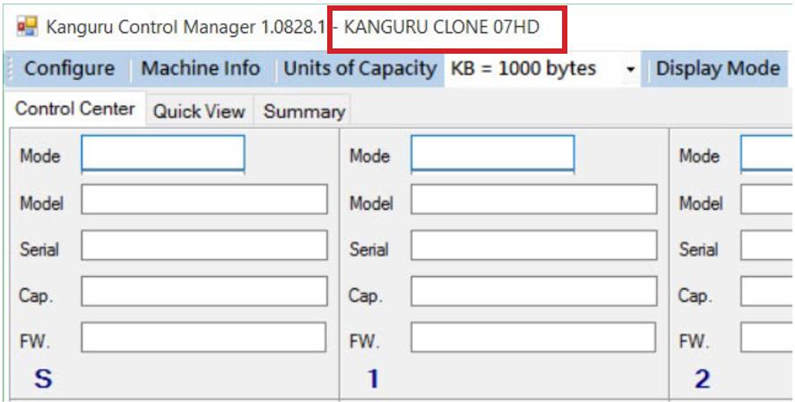
- When a connection between the duplicator and the Control Manager is established, you will see the duplicator model appear in the top left.
Once connected, two plain text files will be created that will log all duplicator activity until you either disconnect the duplicator from the computer or power off the duplicator.


