
HD Pro Duplicator - Duplicating From a Source Drive

Using a Source HDD as the Source is the simplest and most convenient way to perform the duplication process.
IMPORTANT! Connect all Source and Target hard drives before you execute an operation.
To execute the duplication of a Source HDD:
- From the Main Copy Menu, tap the Up or Down buttons to navigate to the desired copy mode. For more information on the different available copy modes see Copy Modes. The screen will display the following:
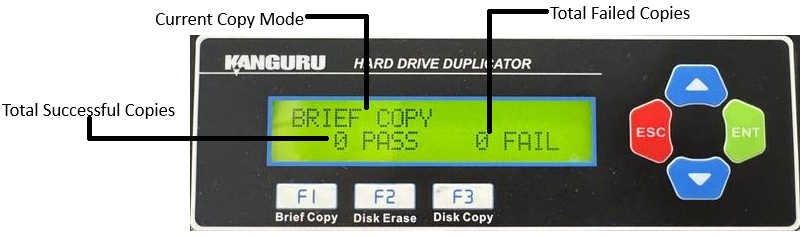
- Note: The system will not detect any connected drives before the duplication starts. Therefore the “Number of Targets detected” value will remain zero until you execute the copy process.
- Once you have selected the desired copy mode, tap the ENT button to execute. The duplication process begins as the system initializes the connected disks. After this point the system will be able to display the number of connected targets correctly.
- Once all connected disks have been detected and initialized, the duplication process begins. During duplication the screen will display the following information:
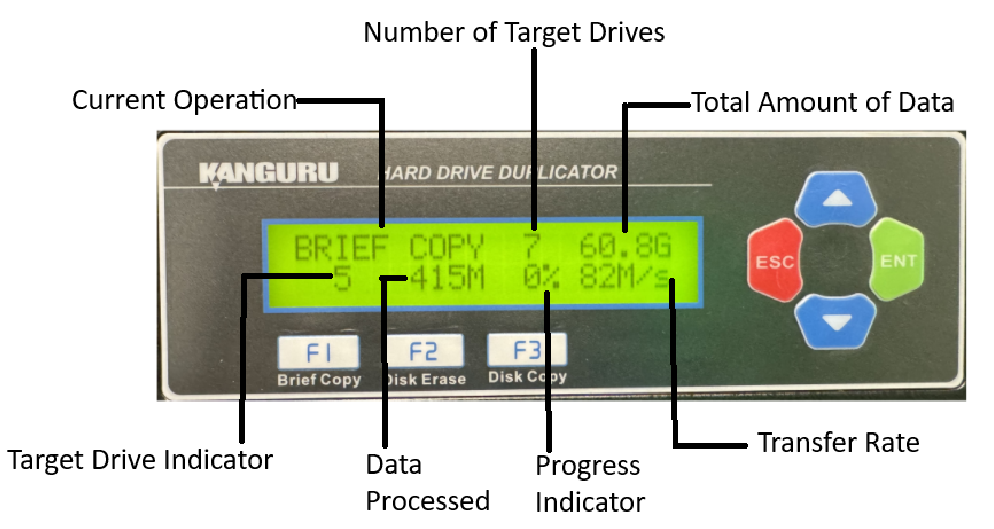
- WARNING! Do not disconnect any drives while they are in use. You can tell if a drive is in use if the LED next to it is blinking. Wait for a solid green or red LED before disconnecting a drive. If you want to cancel the current process, press and hold the ESC button and wait for a solid red LED to come on.
- When the copy process has completed, you will receive a message saying “Remove xPS xFL”, where “x” indicates the number of drives that passed (PS) and failed (FL). Target drives that passed will have a green LED displayed next to it. Target drives that failed the duplication process will display a red LED next to it.
- Tap the ENT button to return to the Main Copy Menu.
Note: The duplicator will keep a running count of the number of passed and failed drives until you change copy modes.


