
Replaced Signed Certificate on KRMC 8

KRMC Enterprise provides the ability to apply your own signed certificate to your KRMC console. Replacing the self-signed certificate with your own certificate is recommended for added security. As always, it is highly recommended that before altering any configuration on the KRMC VM itself, that you make a snapshot of the server. While no issues should occur, if they do you will then be able to quickly revert to the previous state.
Once a proper snapshot or backup is completed, you can proceed with these steps.
1. Open a web browser and log into KRMC. After successfully logging into KRMC, navigate to the following URL to access the certificate import page: "https://<KRMCIPAddress>/server_signed_certs_import".
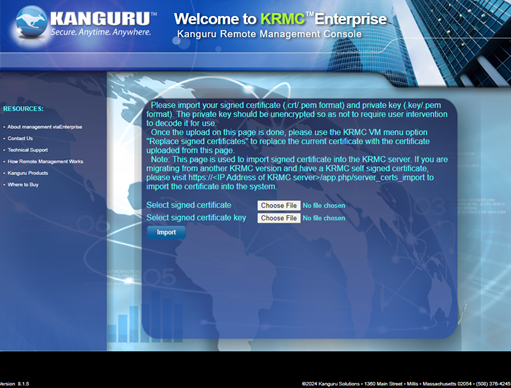
2. The certificate/certificate key upload page appears. Click on the browse... buttons to select your signed certificate and private key.
3. Once the certificate and private key have been selected, click on the import button to upload the signed certificate to the KRMC server.
4. If the signed certificate is uploaded successfully, go back into the KRMC Enterprise Console VM and select “Replace signed certificates”.
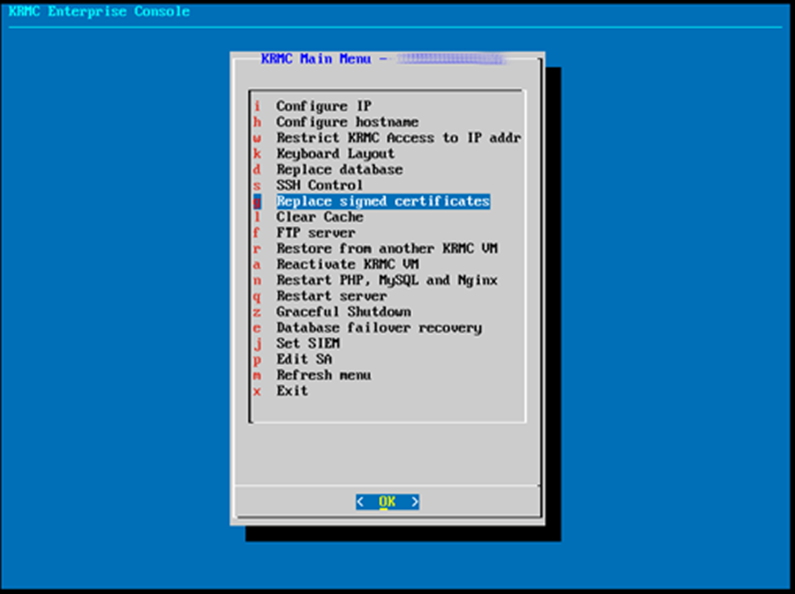
Note: You may need to restart the server once you are completed by selecting “Restart Server” from your KRMC Enterprise Console VM.


